
TickTime 2 Digital Timer Review
The TickTime 2 Standard Timer is a kinetic gadget that does only one thing: measure elapsed time. It’s simplicity itself to use – place the timer on its side and it counts down, place the timer screen down and it…
The TickTime 2 Standard Timer is a kinetic gadget that does only one thing: measure elapsed time. It’s simplicity itself to use – place the timer on its side and it counts down, place the timer screen down and it…

Way back in the mid-noughties, my wife and I were preparing to have a family. Our small house suited us perfectly but to cope with little ones we needed a bit more space and so converted our roof space into…
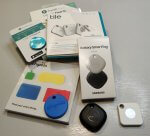
Arriving in Spring 2021, Apple’s beautiful AirTags shook the Bluetooth tracker market in a way that only Apple can, by combining great design with large market share to create an almost irresistible product. When every iPad and iPhone is looking…

Anker is best known for its chargers and battery packs but one of its outlier products is a vertical ergonomic mouse. The idea is that holding the mouse in an upright position keeps the wrist and forearm in a straight…

According to Counterpoint Research, Xiaomi has consistently taken the #3 spot in worldwide smartphone shipments behind Samsung and Apple over the past three years and that’s without even officially selling smartphones in the USA. However, there’s no such problem here…

Months after launching in USA (and the subsequent Star Trek Discovery PR disaster), Paramount+ finally arrived in UK today. Priced at £6.99 per month, the crown jewels are undoubtedly the Star Trek catalogue, but with ComedyCentral, ShowTime and MTV, there’s…
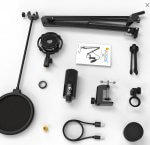
The FIFINE T669 Microphone kit is a budget USB Microphone with everything you need to get started with an adjustable scissor arm, shock mount, desk clamp, and alternative desk stand. It even includes a windscreen. I was honestly pretty shocked…